from IPython.core.display import HTML

HTML(open("custom.html", "r").read())
1. Installation on managed computers from ETH App Store
The ETH software kiosk offers PyCharm and Python 3 packed together for Windows computers (look for WinPython 3.7.X).
If this works you are done and can continue with step 4 !
2. Installing the Python Interpreter
The name "Python" is used in different contexts:
The "Python programming language" refers to the formal specification how valid Python programs look like and what they do.
The "Python interpreter" is a program which runs programs written in the "Python programming language".
Here we install this interpreter.
Download and install Python 3.7.X from https://www.python.org/downloads/.
Pay attention if you use Windows, on Mac you can accept the proposed installer:
- do not accept the offered download but scroll down to "Looking for a specific release?" and choose the newest 3.7.X version.
- Then check for "Windows x86-64 executable installer" (the 64 is important !), download this installer and start it.
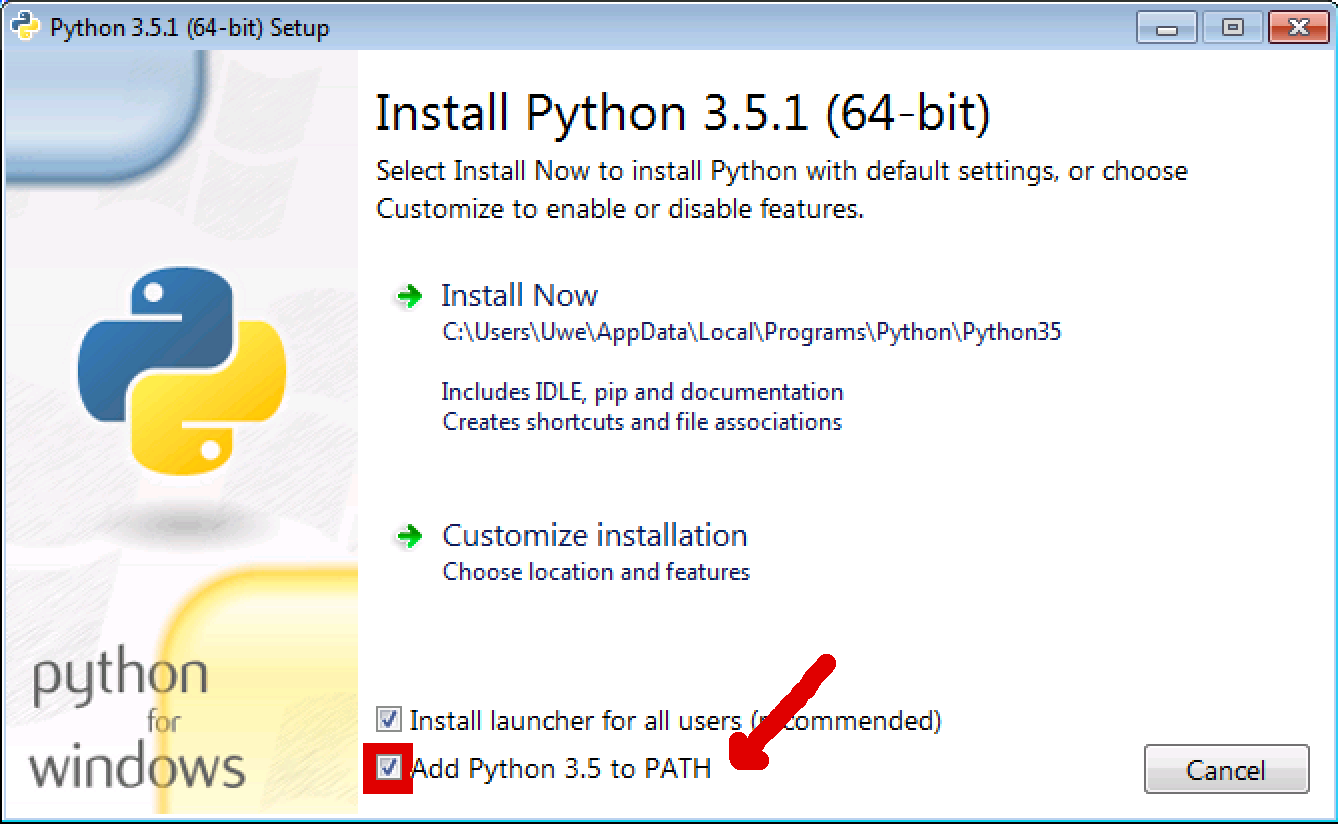
- When you install Python make sure that you set a mark at "Add Python 3.7.X to PATH", then press "Install Now": (the screenshot is partially outdated and shows 3.5 instead of 3.7):
3. Installing PyCharm
PyCharm is a so called "Integrated development environment" (IDE) for Python. This IDE supports you to write and edit Python programs, to find errors (so called "bugs") and to manage programming projects.
Download and install the free Community Edition of PyCharm from https://www.jetbrains.com/pycharm/download/
On Windows: If your computers fire wall says "do you want to allow this app to make changes to your device?" Click on "Yes".
4. First steps with PyCharm: Create a Python project
If you start PyCharm you should see a window similar to the image below:
NOTE: Sometimes before you get to the window below you might see a window asking if you want to import a config file. Just continue without importing any config file.
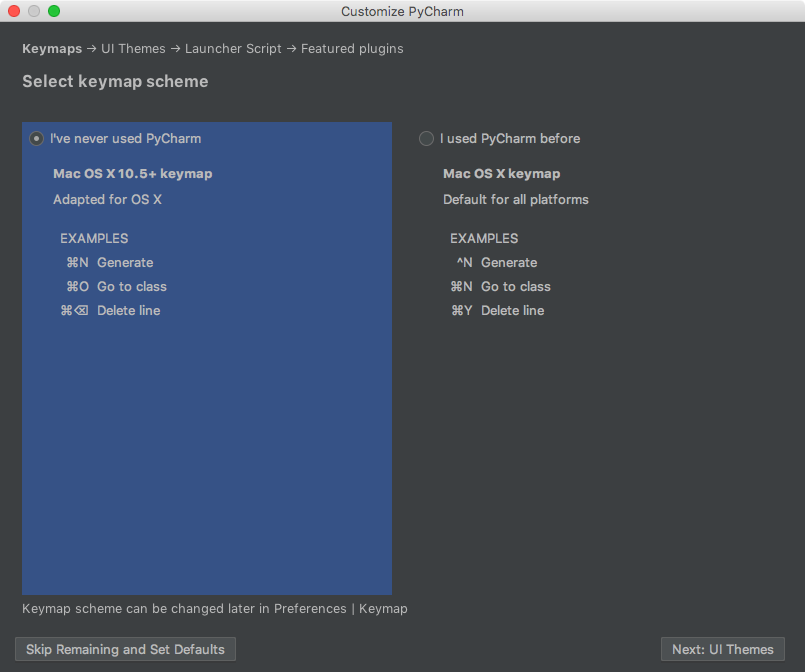
Press Next UI Themes button at the right bottom of this window.
Next activate the Light theme:
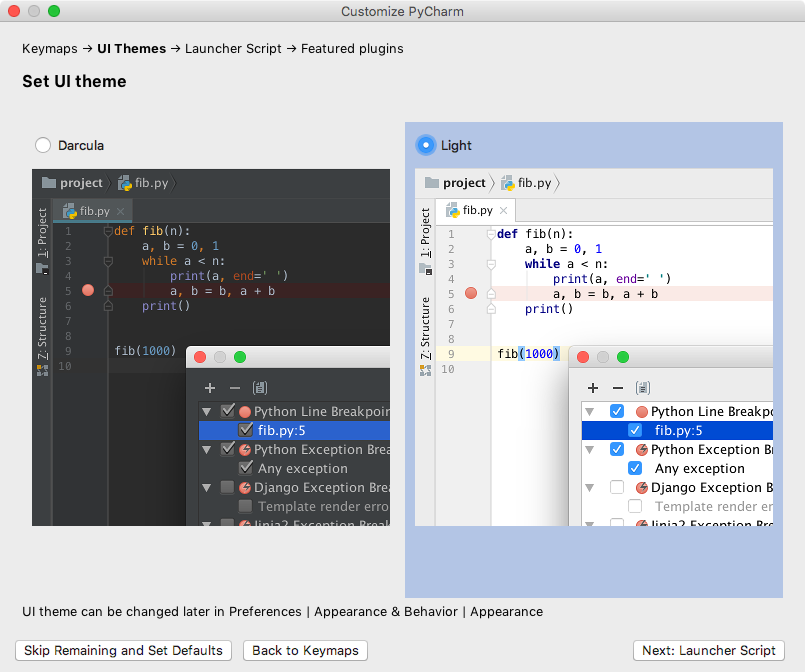
Press the Next: ... buttons on the lower right corner, until you see the screen from the screen shot below:
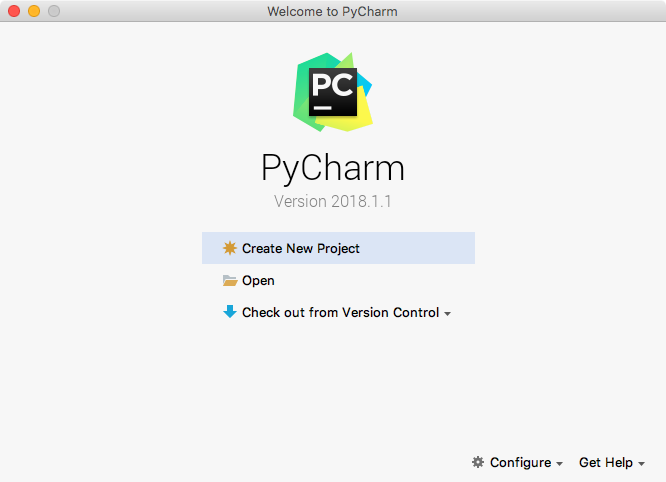
If you click Create New Project a new window opens:
- Enter a reasonable name for your first project in the
Locationfield (here we usepython_introductions) - Select Python 3.7.X in the field named
Base interpreter, the choices will look different on your computer but Python 3.7.X or Python37X should appear in one of the options:

Now press Create. PyCharm should show up now and you should find a small spinning wheel at the very bottom of your PyCharm window. Wait until this process finishes (this can take a while).
5. How to install extra libraries:
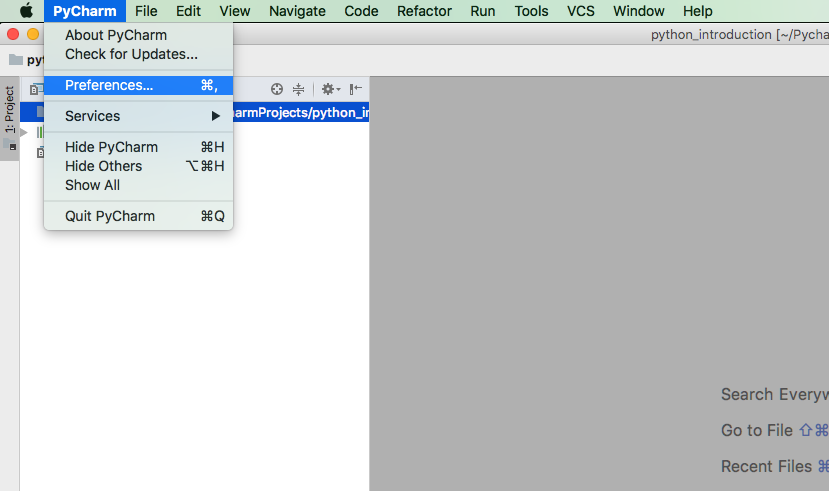
After creating the first project open "Prefereces" which appear below "PyChamr" in PyCharms top menu. You should find the project we just created in the window similar to the one shown below. Press "Project Interpreter":
You should find the current project in the current window:
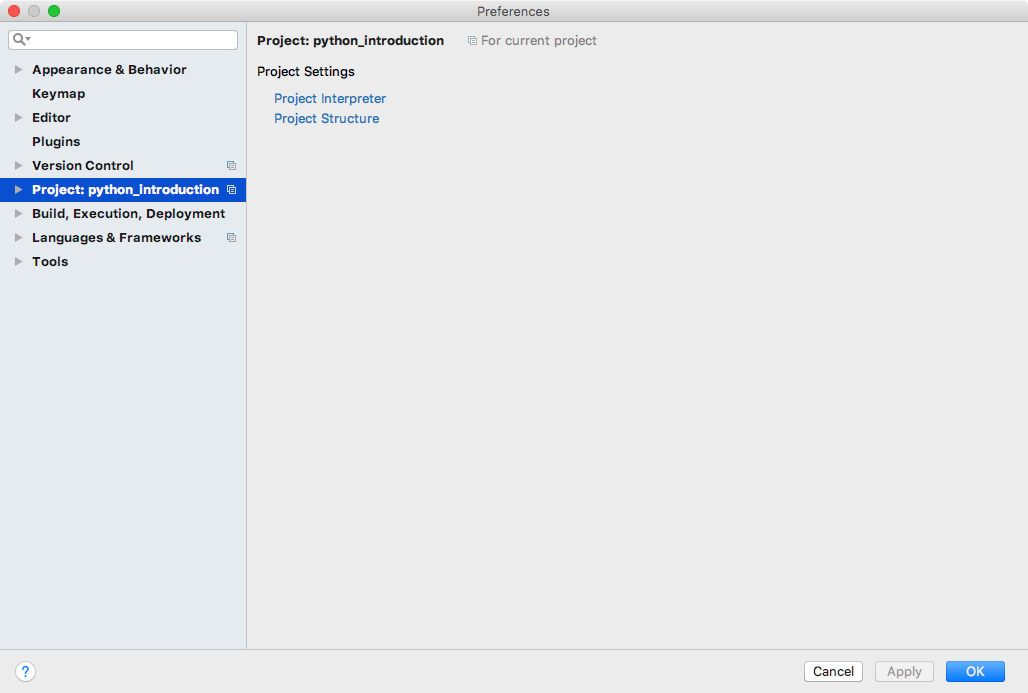
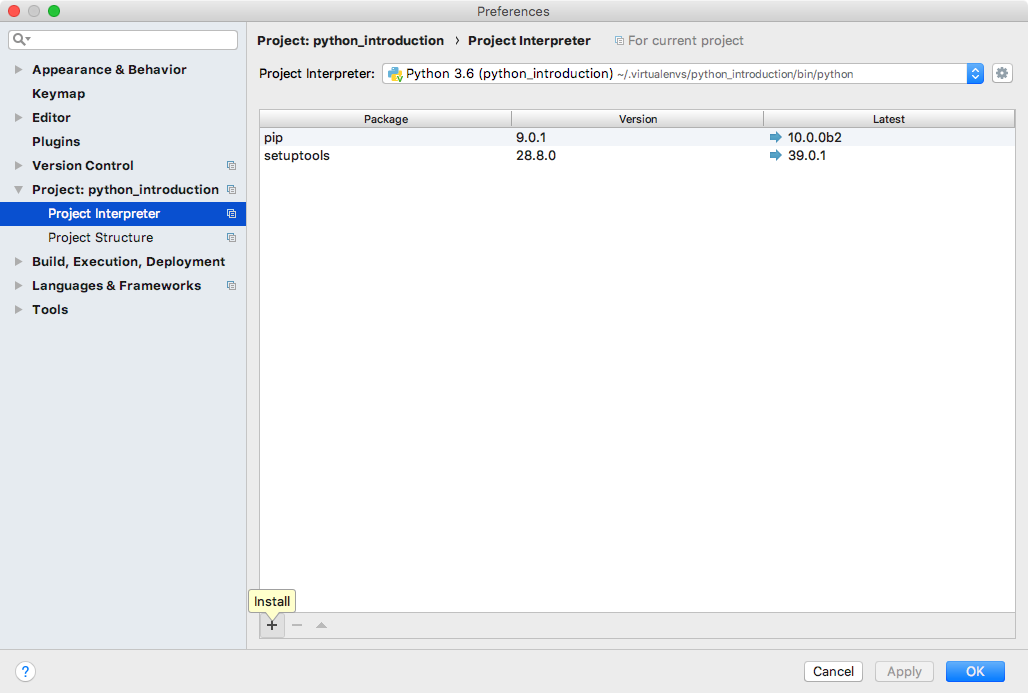
Click on the blue colored Project interpreter. Next you see the setup of your current projects.
To add a new package press the + button on the bottom of the window. The location of this button can change from PyCharm version to Pycharm version:
Type matplotlib in the text field on the top, choose matplotlib in the list of possible matches, then press Install Package to install the most often used plotting library for Python:
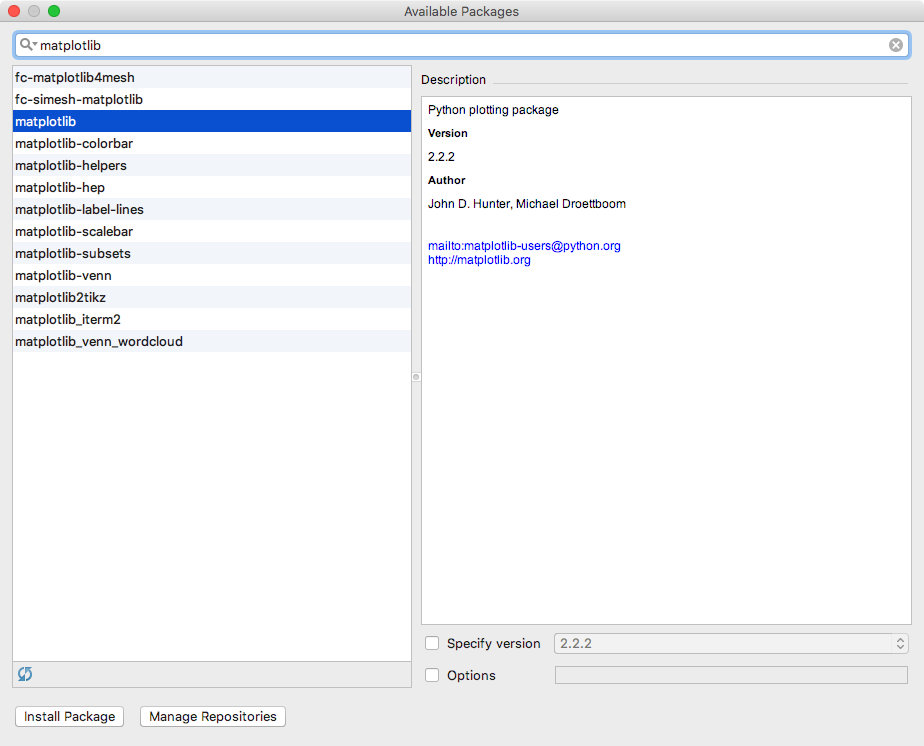
Wait until the greyed out Install Package button is enabled again.
6. Programming within PyCharm
Create a new Python script
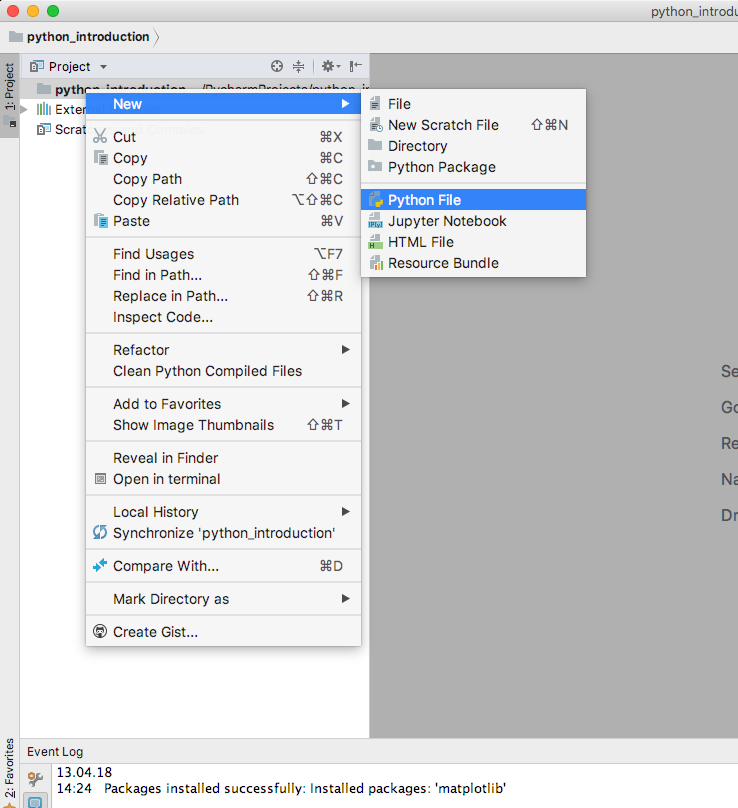
After the previous step you will see the new project in the left part of the PyCharm window. Now move the mouse to python_introductions and press the right mouse button to open a context menu. Then create your first Python script choosing "Python File" (not "File" !):
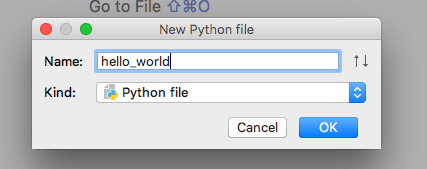
A small dialog box pops up and asks you to provide the name of the script you want to create. We choose hello_world for a simple example. The final file will be hello_world.py but we ommit the file extension:
After this you see the new script listed in the project view on the left side.
Write and run a script
Enter the code line in the code editor on the right side of the window as follows:

The first time you run a new script you have to start it from the context menu of hello_world.py in the Project view (press the right mouse button for this):

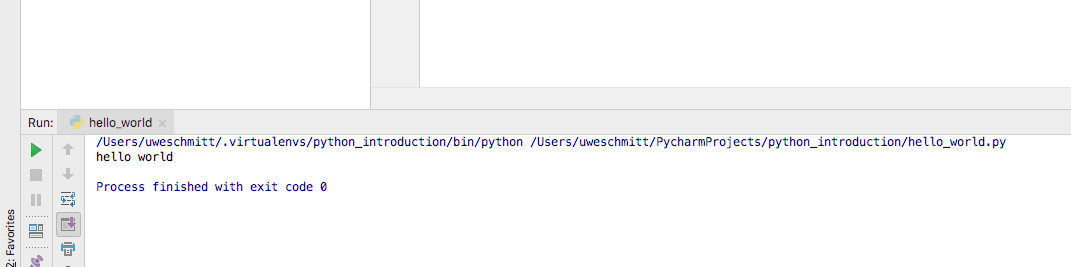
Now you will see the output from the program in the lower part of PyCharm.
The first and last lines displayed in blue are written by PyCharm indicating which program is run and finally saying that the program was executed without any errors.
Edit and run cycle
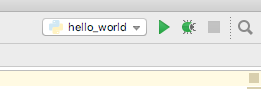
Usually your program will not run on the first try. After you run a script the first time PyCharm remembers the scripts name and to run it again you can press the green triangle icon in the upper right part of the PyCharm window:
Recommendations
- Create a fresh Python file for every script (=program) and exercise
- Give it a reasonable name
Every time you run a script it will start in a fresh Python interpreter process. This means:
- Everything from a previous run (same script or other script) is forgotten
- In particular this applies to variables and
importstatements. - It is recommended to place
importstatements at the beginning of a script.